Working with Nop Quick Tabs
With Nop Quick Tabs you can enable default product information like Full Description, Specifications and Reviews to appear in Product Tabs for all products in your store or define custom tabs for each product.
1. Managing default product tabs
With Nop Quick Tabs you can specify the following product characteristics to appear in Product Tabs for each product:
- Full Description - this tab contains the product's full description as it is set for the product
- Specifications - this tab contains all product specification that are marked as show on product page.
- Reviews - this tab contains all existing reviews for the product and allows the customers to add new reviews
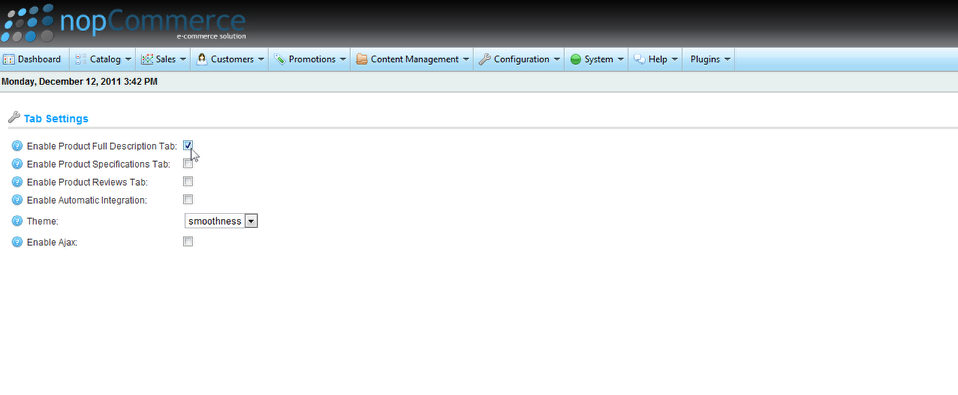
To enable or disable any of these to appear as Product Tabs for each product, from the Admin panel go to Plugins -> Nop Quick Tabs -> Settings.
Check or uncheck the checkbox beside an option that you would like do disable or enable:
2. Defining custom product tabs
With Nop Quick Tabs you can define your own custom tabs. For example a "Computers Buying Guide" tab, which will contain instructions for customers when choosing a computer.
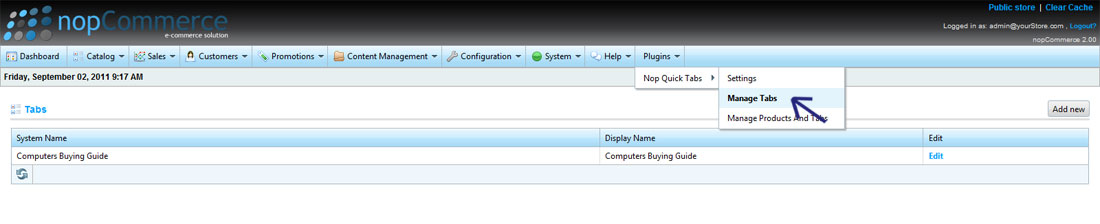
You can manage custom tabs from the Admin panel by going to Plugins -> Nop Quick Tabs -> Manage Tabs.
From there you can add new tabs, edit or delete existing ones:
3. Adding custom product tabs to a product
After you have defined your custom product tabs, you can add them to a product.
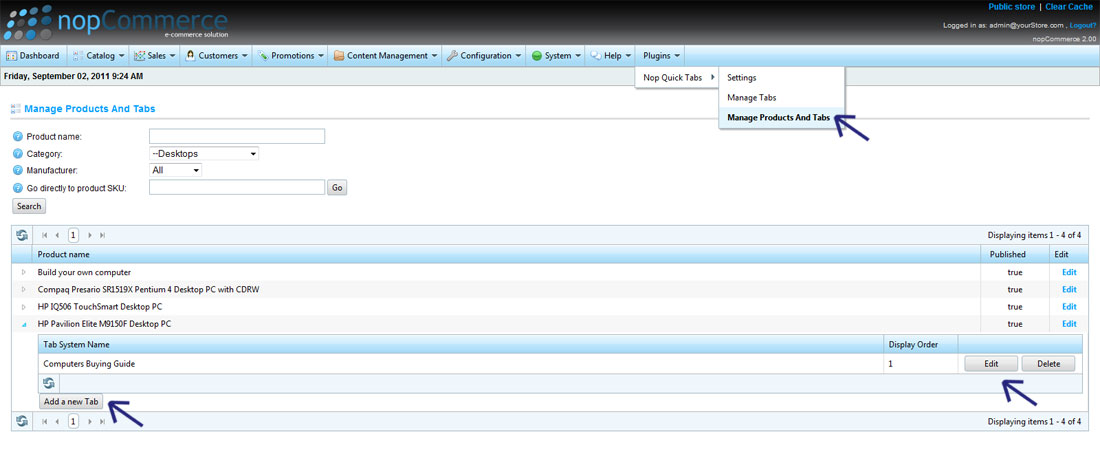
To do this, from the Admin panel go to Plugins -> Nop Quick Tabs -> Manage Products And Tabs.
Expand the product that you would like to contain a custom tab and click on the Add a new Tab button to choose a tab to add to the product.
To edit the product-tab association or delete it use the Edit or Delete buttons besides each product-tab association.
Here you can easily see which tabs are directly mapped to a given product and control the order in which you want to display them. Note: You will see ONLY tabs directly mapped to a product. You will not see any tabs that will be displayed on the product details page if for example these tabs are mapped to a category in which this product is also mapped.
4. To share a Tab between multiple products you have 3 options that are available on the Edit page of the Tab in the Admin panel
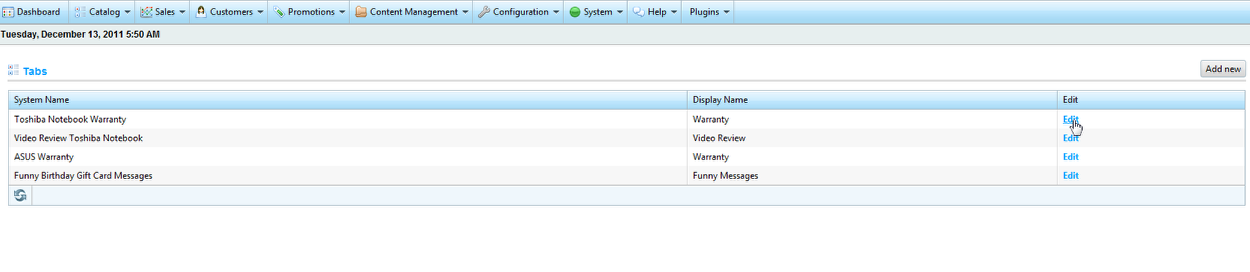
Find the Tab in the list of all available Tabs and click Edit
a) By specifying a maping between the tab and the set of products. Just go to Product Mappings tab and click Add a new Product and then find and select the searched product and click Save.
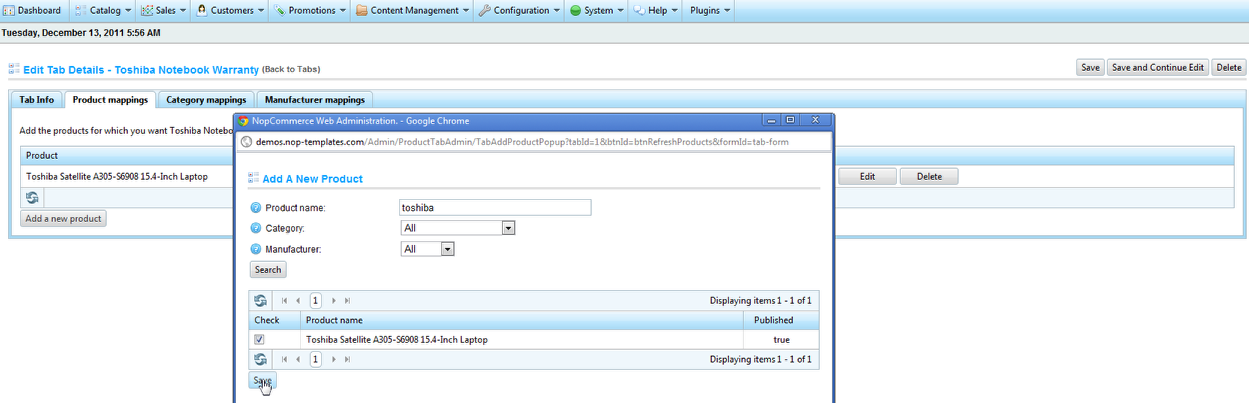
This option is useful if you know which products will have this Tab in advance and you have all products already added in your store.
b) By specifying a mapping with all products in a given category. Just go to Category Mappings tab and click Add new record and then from the dropdown find and select the searched category.

This option is useful if you don't have all the products in your store yet. So if a new product is added there is no need to go and add create an explicit mapping for it with the tab. This saves time and also helps keeping your products consistent within a given category.
c) By specifying a mapping with all products with a given manufacturer. Just go to Manufacturer Mappings tab and click Add new record and then from the dropdown find and select the searched manufacturer.
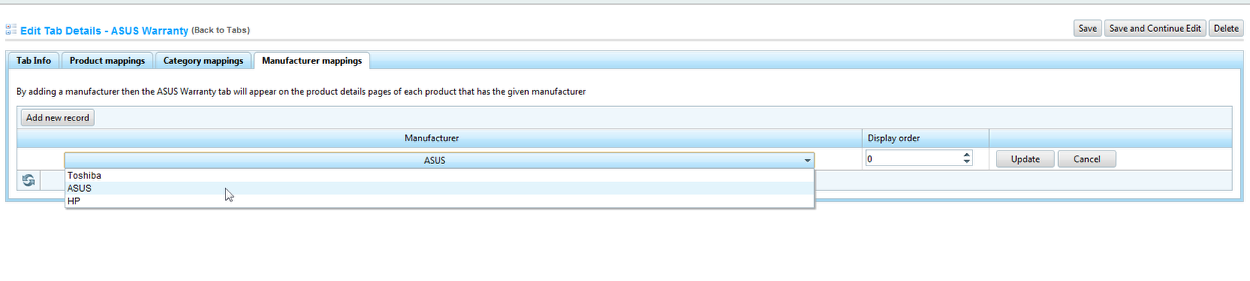
This option is useful if you don't have all the products in your store yet. So if a new product is added for this maufacturer then there is no need to go and create an explicit mapping for it with the tab. This saves time and also helps keeping your products consistent within a given manufacturer.
5. Nop Quick Tabs plugin comes with 3 predifined themes. To select a theme for the Tabs just choose the theme you want from the dropdown and Save the settings.

You can easily create your own themes using JQuery UI Themeroller
5.1. Browse through the Gallary and pick up a theme.
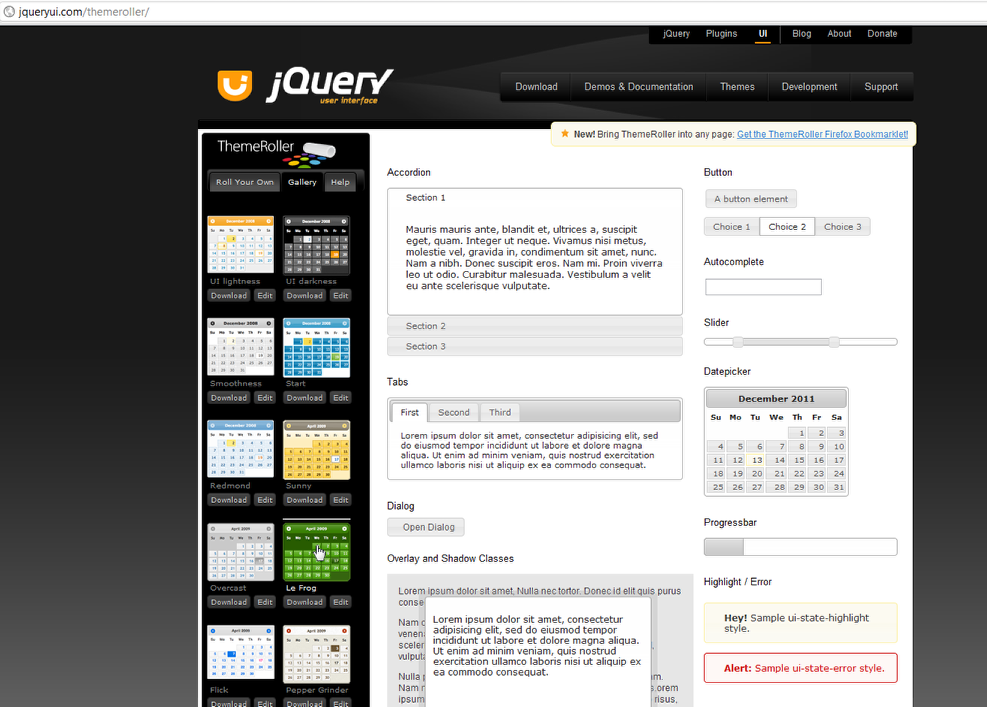
5.2 Once you pick up a theme then go to Roll Your Own tab next to Gallary
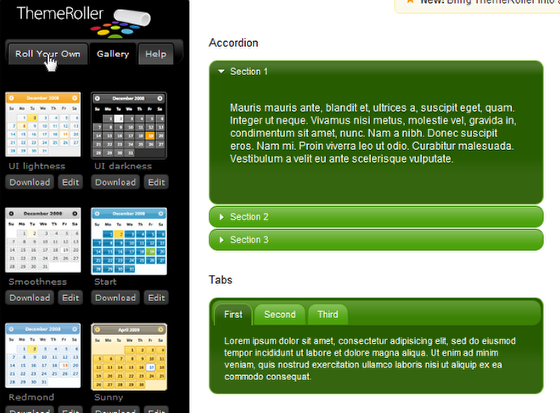
5.3 You can now modify some of the aspects of the theme like the background colors and the borders of the different parts ot the tabs i.e Header, Content etc.

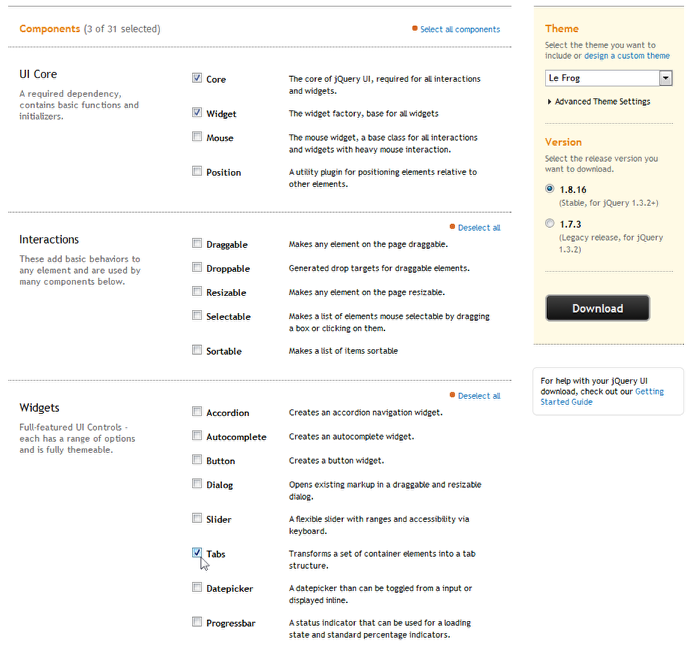
5.4 Once you are done with the modifications. Click Download Theme button and here you need to choose which files to download. Please click on Deselect All Components and then go and check only the Tabs. Your selection should looks like the one below.
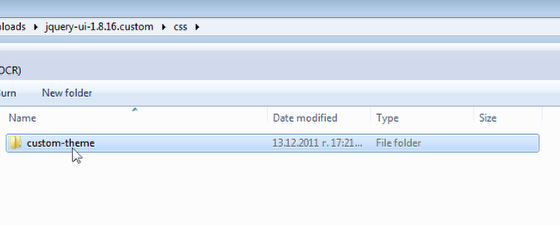
5.5 Click the Download button and Save the file. It is a .zip file and needs to be extracted. Once extracted find the folder called CSS and copy the inner folder.
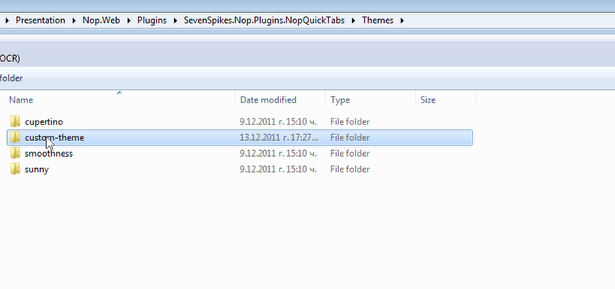
5.6 Now paste this folder into the Themes folder of the Nop Quick Tabs plugin folder. One the server the path shoud be Plugins\SevenSpikes.Nop.Plugins.NopQuickTabs\Themes and on your local machine the path should be like the one below
Now your custom-theme will be shown in the Themes dropdown on the Tab Settings page in the Administration. You can select it and save the settings. Now your theme will be used to when showing the Tabs in your store.
If you want to rename your theme then you need to rename the theme folder and select the newly created name from the list ot available Themes. Note that a refresh of the Settings page will be needed to see the new theme name.
6. To enable or disable the Ajax loading of the Tabs just check or uncheck the Enable Ajax checkbox and click Save

The Ajax option is useful if you have too many Tabs that are also not small in size in terms of the content in them and you don't want to load all of them when the product page is laoded.