NopCommerce version 3.20 was released last week and for those of you who are not yet familiar with the new version or have just skimmed through the release note we have a detailed overview of the new features.
Working with the new features in nopCommerce 3.20 would often require a quick modification of certain settings or language resources. Therefore before I go into the details of each nopCommerce 3.20 feature I would like to point your attention to these two videos in case you are not familiar with these small but useful nopCommerce tricks:
How to search and change resources in nopCommerce
How to search and change settings in nopCommerce
NopCommerce 3.20 has a set of highlight features and and a set of minor ones. I will cover all of the new features but before we start with the highlight ones I would like to mention one of the minor features which I believe should really be listed as a major one. This is the new RTL support for the administration panel. Now if you have a language which is marked as RTL your nopCommerce administration will be indeed shown in an RTL orientation:
Let's move on to the highlight features.
1. The first feature that will grab the attention of every nopCommerce store owner is the new Facebook Shop. Now if you go to the nopCommerce administration -> Configuration -> Plugins, you will see a new Facebook plugin:
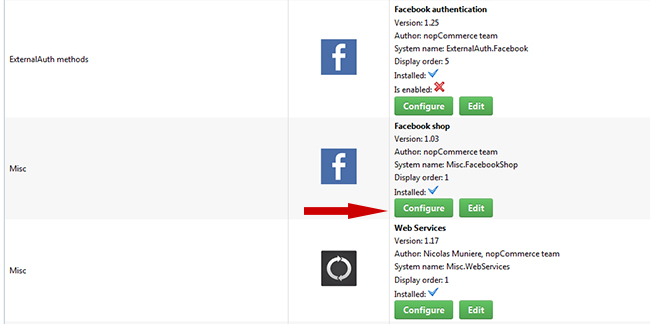
If you click the Configure button you will be taken to a page, which explains how to setup your Facebook Shop:
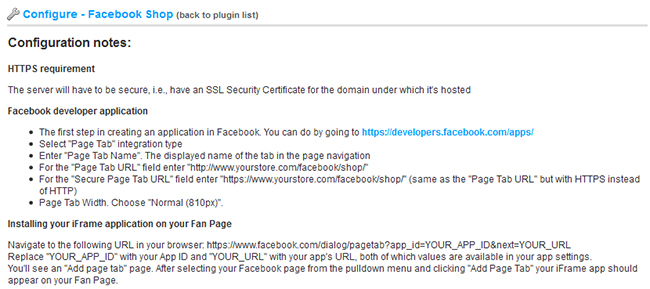
Setting the Facebook shop is straightforward as you can guess from these brief instructions. The most important thing to note is that before you setup your Facebook shop, your website would need an SSL. If you do not have one, you can always purchase it from your hosting provider and ask them to set it up for you.
2. The next major functionality that comes with nopCommerce 3.20 is its support for warehouses. What this means is that you can configure individual products to be shipped from a specific location (warehouse). You can also configure the system to use the warehouse location when calculating the shipping cost for the product.
First you start by configuring your warehouses from the Configuration -> Shipping -> Warehouses administration:

What is important here is to configure an address for your warehouses.
Next when editing a product you need to specify in which warehouse it is located:

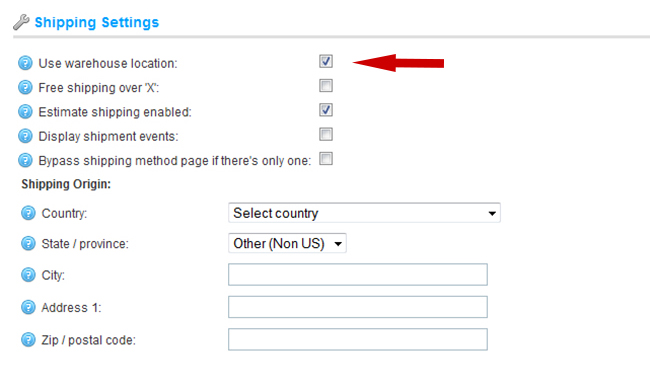
If you would like nopCommerce to take into account the warehouse location of a product, when calculating its shipping rate, you will need to edit the Configuration -> Settings -> Shipping Settings and check the "Use warehouse location":
3. While we are on the nopCommerce 3.20 shipping functionality, there is another new feature worth mentioning. Now the store owner can specify when a product will be shipped. In nopCommerce this information is referred to as delivery date. This is useful for example when you are selling products, which are manufactured on demand. You can setup different delivery dates from the Configuration -> Shipping -> Delivery Dates administration:

When you create or edit a product you can specify its delivery date:

The delivery date would appear on the product details page and would be useful to the customers before they make their purchases.
4. Although we are covering the major features I would like to mention one very little but useful feature again related to the shipping functionality in nopCommerce 3.20. Now when you mark a product as Free Shipping:

This would be reflected on the product details page and a Free Shipping image would be visible to the customer. This was missing before and customers could only realize that a product is free shipping during the checkout process:
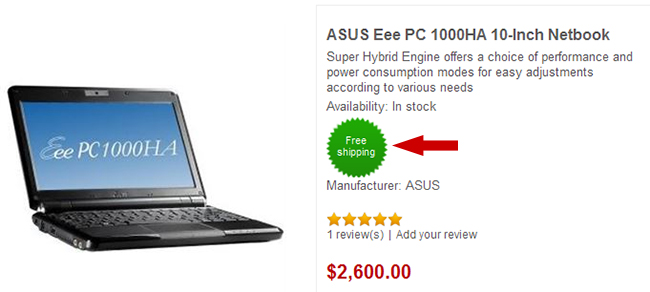
If green is not your color you can change the free shipping image by replacing this file
Themes\DefaultClean\Content\images\free-shipping.png
If you are not working with the Default Clean theme, just replace the DefaultClean part of the path with the name of your theme.
You can also change the "Free shipping" text by changing the "products.freeshipping" language resource. If you are not sure how to change language resources in nopCommerce, do watch this video.
5. Vendors were introduced in nopCommerce 3.0 but only as a backend functionality. Store owners could assign products to different vendors and manage who has permissions to see and edit these products. But all this was hidden from the customers of the store. In nopCommerce 3.20 there is a new Configuration -> Settings -> Vendor Settings -> Show vendor on product details page. When this setting is set you can see a link to the product vendor on the product details page:
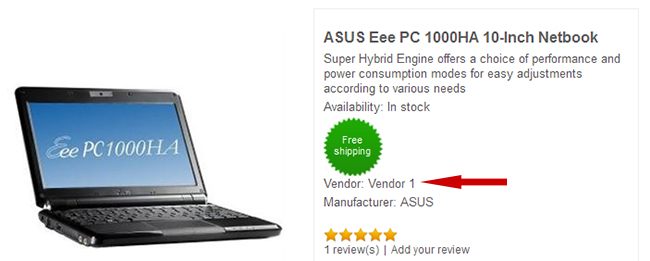
Clicking on the vendor link customers are now able to see all products delivered by this particular vendor:
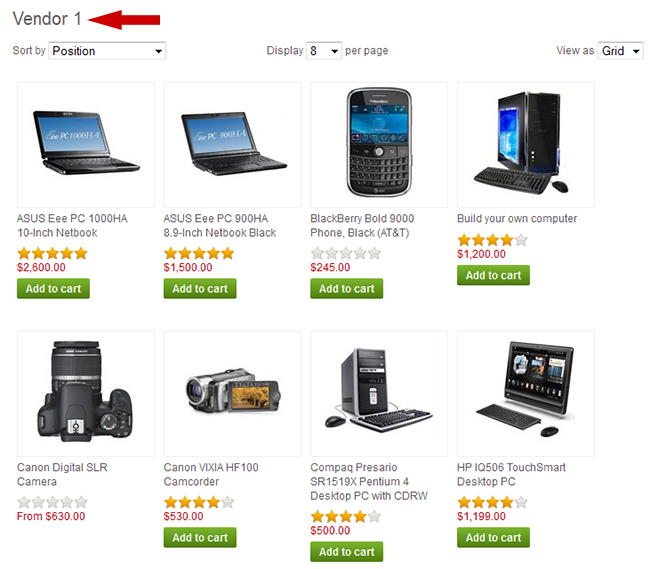
6. In nopCommerce 3.20 there is a new store menu, which shows the main categories from the store:
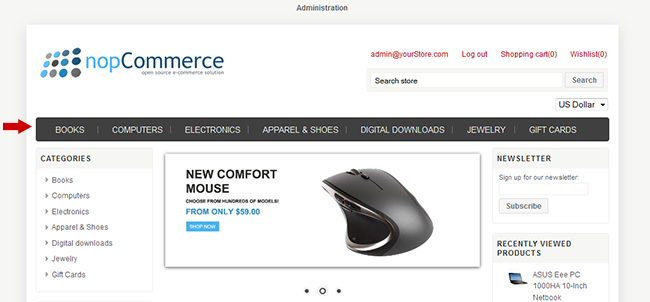
This is different from the previous versions, where you had only the Home, About Us, etc... links. In the new menu you can configure how many subcategory levels are shown in the drop down menu by editing the Configuration -> Settings -> Catalog Settings -> :

If you are looking for more flexibility and control on what is shown in the nopCommerce main menu and how it is shown, do checkout our Nop Mega Menu plugin.
7. The last but not least major change in nopCommerce 3.20 is its performance optimization.
Now CSS files are being bundled and minified, a feature which was contributed by the Nop- Templates development team. In addition to this more frequently used data is being cached in memory, which decreases the response time significantly.
8. Although this is not a feature, it is important to mention that nopCommerce 3.20 now runs on MVC 5. What is new in MVC 5 is beyond the scope of this article but you can read more on the official MVC 5 release note.
I have covered all the major features in nopCommerce 3.20. Next I will mention the other new features, which although classified as minor ones, I believe are extremely useful to the nopCommerce store owners and developers.
9. In nopCommerce 3.20 you can change what templates are being used for the category, manufacturer and product pages from the administration panel:
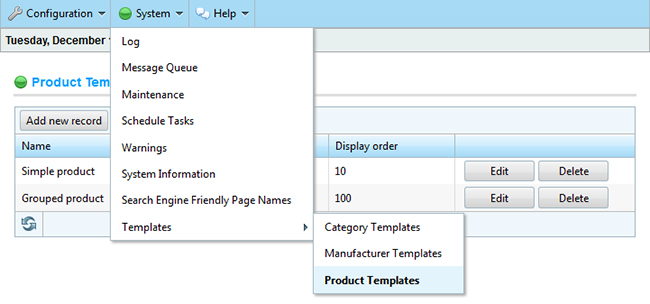
This is very handy because to achieve the same in previous versions you had to edit the database directly.
10. Have you ever tried to run a scheduled task on demand in nopCommerce, let's say Send Emails? In previous versions you had to reschedule your task to run every second and then restart your application. After that you had to revert the schedule of your task and restart your application again. In nopCommerce 3.20 you can run a scheduled task immediately:
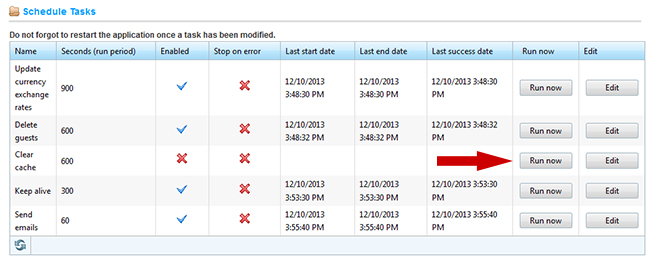
In this way you are not only saving time and effort but also not restarting your application twice, which would make your website not respond for at least 30 seconds on every restart.
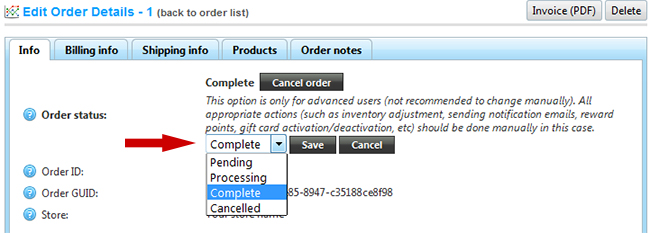
11. In nopCommerce orders have different statuses (Pending, Cancelled, Complete). Before nopCommrce 3.20 changing an order status would require a direct edit of the database. And if you have been running an online store you would know that a store owner should be able to change an order status manually with no hustle. In nopCommerce 3.20 this is now possible from the administration panel:

12. Another new and useful feature related to the order management in nopCommerce 3.20 is the possibility to see all orders for a product. There is a new tab in the product administration page, called Purchased with orders:

13. You can also view what orders a discount has been used with. On the discount administration page, the Usage history tab is now a much more useful source of information:

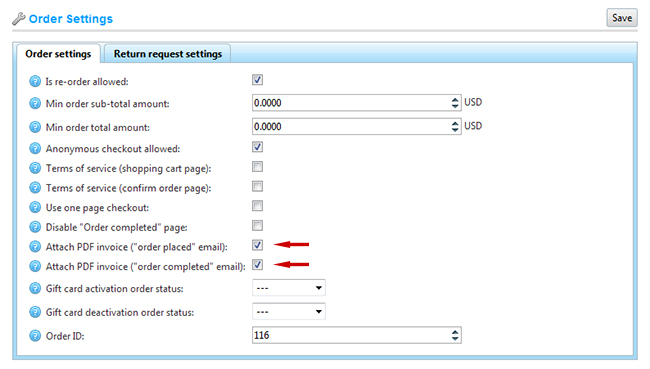
14. In nopCommerce 3.20 when an order is being processed, the store owner can choose to include the automatically generated invoice with the order placed or order complete email sent to the customer. This can be done from the Configuration -> Settings -> Order Settings administration:
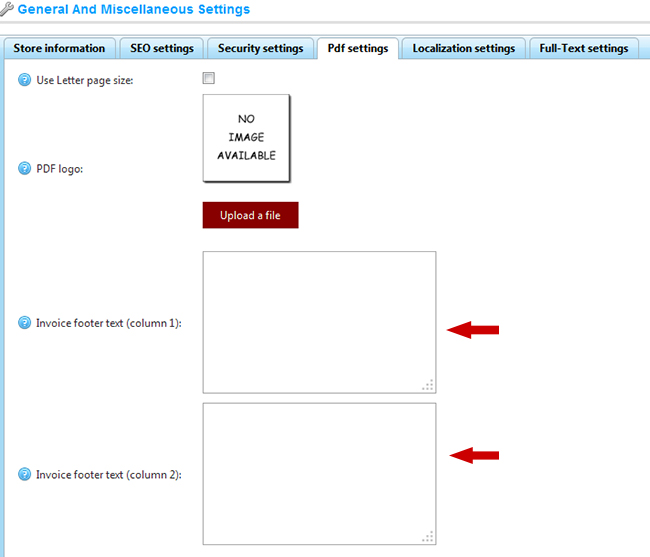
15. If you would like to add additional information to your invoices (remember that they are automatically generated by the system), now you can do so. Going to the Configuration -> Settings -> General and miscellaneous settings, you need to click on the PDF Settings tab and use the two new fields to add text to the footer of the invoices:
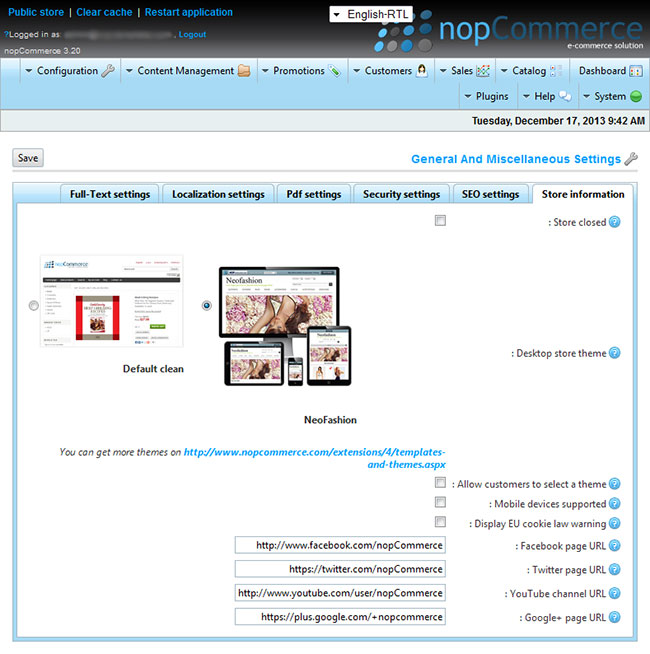
16. Moving on from the order management, in nopCommerce 3.20 there is a nice little CMS feature which allows the store owner to manage the social links in the footer of the website. This can be done from the nopCommerce administration -> Configuration -> General and miscellaneous settings -> Store Information tab:

In the public website this information is presented in the footer:

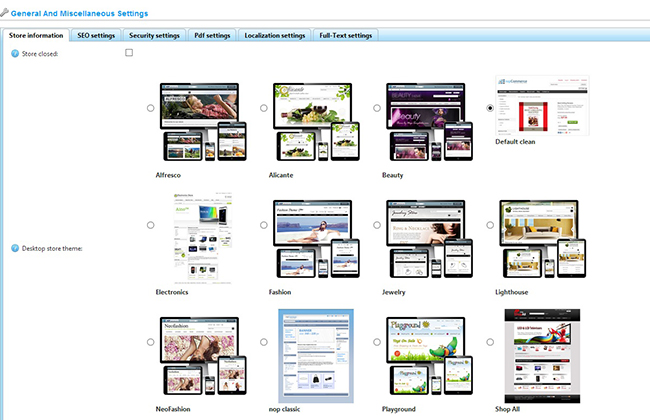
17. NopCommerce 3.20 allows the store owner to choose from the active themes in their store in a much more user-friendly way. Now if you go to the Configuration-> Settings-> General and miscellaneous settings you will see that the themes dropdown has been replaced with a nice set of radio buttons, showing a preview of the active themes:
18. I would like to finish the overview of nopCommerce 3.20 with one very little but very useful feature, which is the auto complete tags in the product administration:

The release note of nopCommerce 3.20 is extensive and covering all the new funtionality would be impossible in one blog post. But feel free to study the changes in more details here:
http://www.nopcommerce.com/releasenotes.aspx
http://nopcommerce.codeplex.com/workitem/list/advanced
As you can see in nopCommerce 3.20 not only are the new features quite a few but they are also very handy and will greatly facilitate the work of the nopCommerce store owner.
The nopCommerce developers will appreciate the performance optimizations, the code refactoring and the move to MVC 5. There is also the new deploy directly from Visual Studio but I will cover this in a separate blog post.
So stay tuned for more useful information on this new and strong release of our favorite e-commerce system. Do not also forget to check our new video page, which is constantly being updated with video tutorials on nopCommerce.


I'm very excited that nop-templates has been working closely with nopcommerce in recent releases and this latest release is the best yet.
Good job Nop-templates team!